SFS 4113 Series
Additional tools
Full Installation Guide
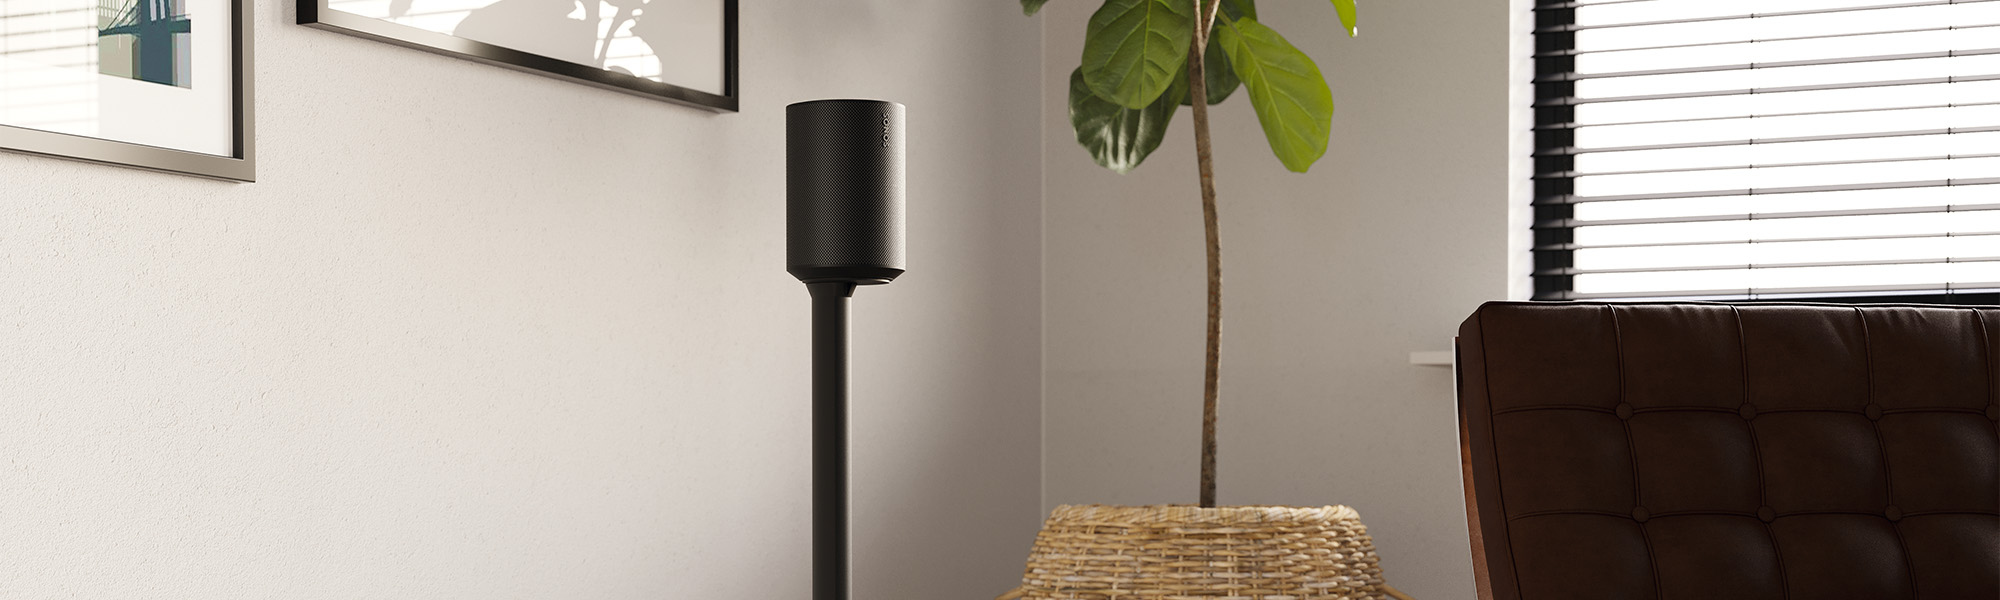
Everything you need to get your Era 100 mounted, in no time
Before you start
…we just wanted to say thanks for choosing Vogel’s. Smart choice.
And you’re already making another smart choice – reading the manual! Keep reading to learn all about safe, efficient installation, and how to use your new speaker stand.
Stay safe

Warning
Always read these safety instructions carefully before installing and using this product.
Following these instructions is strictly required. Incorrect mounting and/or installation could put you, your speaker, and your family at substantial risk.
- Vogel’s recommends that the mounting and/or installation of this product should be carried out by a suitably qualified expert.
- Vogel’s cannot be held responsible for any injury and/or damage caused by incorrect installation.
- Please be advised that this speaker stand is exclusively designed for the use with the Sonos Era 100 speaker model. Utilizing this stand with other models or brands could potentially result in instability, malfunction, or damage to your equipment, and may also pose a safety risk.
- Clean the product with a dry, lint-free cloth. Do not use detergents or other solvents to clean the product.
- Only qualified, certified personnel may repair the product. Use only original spare parts. The use of other parts will result in voiding the warranty, and could lead to injuries.
- Alterations to the product and technical modifications are not permitted. This will void the warranty, and could lead to injuries.
- Always store the product in a dry and safe place with a temperature between -10°C to +50°C.
- Handle and transport the product with care.
- Repack the product when transporting or not using it for a longer period of time.
What’s in your box?

- Something missing? Make sure your packaging has everything in place:
- Pole
- Floor plate
- Pole cap
- Top plate
- Cable guide tool
- Quick installation manual
- 3x M5*35mm bolts
- 2x M5*35mm bolts
- 1x M5*12mm bolt
- No.3 Allen key
Got your tools ready?

-
Don’t start without all the necessary tools:
- Cable guide tool (included)
- No.3 Allen key (included)
- Large crosshead screwdriver
Additional tools
Ready… set… get installing!
Step 1: Assemble the speaker stand

- Put the pole Ⓐ on the floor plate Ⓑ.

- Attach the pole Ⓐ to the floor plate Ⓑ using the 3 x M5*35mm bolts Ⓖ.

- Put the cable guide tool Ⓔ on the speaker plug of the ERA 100 cable (included with the speaker).

- Push the plug with the cable guide tool Ⓔ into the bottom of the floor plate Ⓑ and through the pole Ⓐ.

- Remove the cable guide tool Ⓔ and pull the plug through the pole cap Ⓒ and put the cable in the slot on the back of the pole cap Ⓒ.

- Attach the pole cap Ⓒ and the top plate Ⓓ to the pole Ⓐ using 2x M5*35mm bolts Ⓗ.
Step 2: Attach ERA 100 to the speaker stand

- Connect the plug to the speaker.
- Attach the Era 100 speaker to the top plate Ⓓ using the 1x M5*12mm bolt Ⓘ.
Job done now! Enjoy listening to your Era speaker!

Having a cable mess? Do you need inspiration about how to hide and guide your cables? Take a look at our website vogels.com!
Removing your Era speaker

- Unscrew the 1x M5*12mm bolt Ⓘ from the top plate Ⓓ to remove the Era 100 speaker.
- Disconnect the plug from the Era speaker.
Confused? Unsure? Going crazy?
There’s plenty of help waiting for you, online:


Simple troubleshooting
Found a problem you can’t fix? Don’t panic… try these!
Problem
Cause
Solution
Problem
‘I can’t get the plug through the pole!’
Cause
The plug has a very jagged shape that is difficult to guide through the pole.
Solution
Use the provided cable guide tool to help guide the plug through the pole.
Go green!
We care about the planet. If you’re getting rid of the packaging or the TV mount itself, please check your municipality’s guidelines for the best disposal options near you. For information about the materials used in the packaging, visit www.vogels.com/recycle. Recycling matters!

Guarantee

Thanks again for choosing Vogel’s! Durability is paramount in the development and production of our products.
If your product is not functioning properly due to material faults or manufacturing defects, we will repair it free of charge or replace it at our own discretion.
If you have any problems with our product or want to know whether the guarantee is applicable, please:
- Complete the contact form or mail our Consumer Care Team. Preferably, please add a picture.
- Within 2 business days you will be contacted by our local Vogel’s distributor.
- If the guarantee is invoked, the product should be returned, together with the original purchase document (invoice, sales slip or cash receipt). The purchase document should clearly show the name of the supplier and the date of purchase. You will be informed about the specific return address and further procedure.
- If the product has not been installed or used in accordance with the instructions;
- If applicable, if the holes in the wall have not been properly drilled in accordance with the Vogel's installation instructions for the applicable wall type;
- If the product has been altered or repaired by someone other than Vogel’s;
- If a fault arises due to external causes (outside the product) such as for example lightning, water nuisance, fire, scuffing, exposure to extreme temperatures, weather conditions, solvents or acids, wrong use or negligence;
- If the product is used for different equipment than is mentioned on or in the packaging.
Vogel’s guarantee shall lapse in the following cases:
Do you have any other questions? Please make use of our contact form.
Vogel’s Products BV - Hondsruglaan 93 - 5628 DB Eindhoven - The Netherlands
Vogel’s Products BV 2024 © All rights reserved.